Easy Guide to Wrapping with Brown Car Wrap | Nascarwraps
Car wrapping has become a popular way to customize vehicles, and Brown Car Wrap are no exception. Whether you’re looking to give your car a unique look or protect its original paint, wrapping can be a great option. Here’s a comprehensive guide to help you navigate the process.
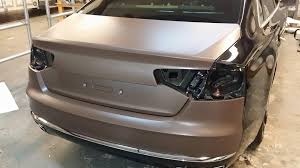
1. "Selecting Your Brown Wrap"
Before starting, choose the right shade of brown for your vehicle. Brown wraps come in various finishes, including matte, gloss, and satin. Consider your vehicle’s style and how the color will complement it. Always request samples to see how the wrap looks in different lighting conditions.
2. "Preparing the Surface"
Preparation is crucial for a successful wrap. Thoroughly clean your car to remove dirt, grease, and wax. Any imperfections on the surface can affect adhesion and the overall finish of the wrap. Once clean, dry the surface completely.
3. "Measuring and Cutting"
Measure each section of your car to ensure you cut the wrap accurately. Leave a little extra material at the edges for adjustments. It’s better to have too much than too little!
4. "Applying the Wrap"
Start with the larger panels and use a heat gun to make the vinyl pliable. Slowly apply the wrap, smoothing it out to avoid air bubbles. For edges and curves, use a squeegee to press the vinyl down firmly.
5. "Finishing Touches"
Once applied, trim off excess vinyl using a sharp blade. Heat the edges to ensure they adhere correctly. Finally, allow the wrap to cure for a few days before washing or exposing it to harsh conditions.
Wrapping your vehicle with a brown car wrap can transform its appearance and protect its paint. With careful selection, preparation, and application, you can achieve a professional-looking result. Whether you're a DIY enthusiast or considering professional help, understanding the process will ensure your car looks stunning.(FlexiShield Car Wrap)